This is a place where I collect and archive recipes from all over the place. These recipes were picked because these are food that I love to eat. I copied the recipes from other sources and I have included the links to each source.

I have cooked some of these dishes and I would be happy to discuss my story with you. Feel free to email me at scientistcooks@gmail.com or check out my food blog www.foodmolecule.blogspot.com

Wednesday, December 28, 2011

Horchata

 http://allrecipes.com/recipe/lolas-horchata/

 some notes from reviewer,

1) need more milk, less water

2) use fresh cinnamon stick instead of ground cinnamon powder

3) slowly adjust sugar content

4) Let mixture sit overnight

Ingredients

  • 1 cup uncooked white long-grain rice
  • 5 cups water
  • 1/2 cup milk
  • 1/2 tablespoon vanilla extract
  • 1/2 tablespoon ground cinnamon
  • 2/3 cup white sugar

Directions

  1. Pour the rice and water into the bowl of a blender; blend until the rice just begins to break up, about 1 minute. Let rice and water stand at room temperature for a minimum of 3 hours.
  2. Strain the rice water into a pitcher and discard the rice. Stir the milk, vanilla, cinnamon, and sugar into the rice water. Chill and stir before serving over ice.
  3.  
  4.  
  5.  
  6. NEW
  7.  http://www.girlichef.com/2012/07/coconut-horchata-horchata-de-coco.html
  8. Coconut Horchata (Horchata de Coco)

    Well, it's official.  I cannot walk through a grocery store on a 101° day without purchasing at least 3 containers of cold drinks and 2 or 3 random boxes of ice cream or ice cream novelties.  It's like my thirst is never quenched.  But that is what you get when your car does not have a working air conditioner.  And the driver's side window does not roll down.  It makes me want to cry.  But I can't cry, because all the water is coming out of my body in the form of sweat.

    Therefore, cold drinks are consumed in massive quantities.

    Earlier, the hubs asked me what was for dinner.  I don't if it was the look on my face or the shrug of my shoulders, but he took it upon himself to order tacos and tortas from our favorite local Mexican restaurant.
    Hooray for not heating up the kitchen!  And hooray for that tall, white, styrofoam cup that he set in front of me when he brought it all home!

    Why hooray?  Because the liquid that ice was sloshing around in is one of my favorite agua frescas.  Horchata!  There's not much like washing down a Torta con Milanesa de Pollo with a cold glass of lightly sweetened, cinnamon-scented rice water.
    And I realize now that I've never posted "regular" horchata here on this site.  It's another one of those usual suspects that gets made fairly regularly and therefore slips through the cracks.  So that is a post for another day.  Today I bring you a different version of horchata.  Not the one the hubs brought me today.  But the one that I made a few days ago and is already long gone...the reason why he had to bring me some today.

    And this one...it uses coconut.  It's not overwhelming, just perfectly refreshing.  And it's a great way to stay cool and hydrated in the heat!

    Coconut Horchata (Horchata de Coco)

    by Heather Schmitt-González
    Prep Time: overnight
    Cook Time: n/a
    Keywords: blender beverage vegetarian rice coconut milk Mexican

    Ingredients (1½ quarts)
    • 1¼ c. raw white rice
    • 1 lime (zest only)
    • 5 c. water, divided + more as needed
    • 1 (14 oz.) can coconut milk
    • ¾ c. superfine sugar
    • ice cubes, to serve
    Instructions
    Cut the zest from the lime in one (or two) long strip, leaving as much of the pith (white part) behind as you can. Place it in a medium-sized bowl along with rice and 2½ cups of the water. Stir and cover with plastic. Let stand overnight.

    Transfer everything in the bowl to the jar of a blender. Blend for several minutes, or until you can rub a drop between your fingers and it no longer feels very gritty.

    Add 2 cups water and blend for another minute. Set a strainer lined with a double layer of damp cheesecloth over a clean bowl or pitcher. Pass the mixture through the cheesecloth-lined strainer. Once all the liquid has gone through, gather up the corners of the cheesecloth and twist to release any liquid.

    Stir in remaining ½ cup of water, coconut milk, and sugar until the sugar is dissolved. If consistency seems too thick, add a bit more water. Cover and refrigerate until ready to serve.

    Serve over ice cubs in tall glasses, stirring before serving.

    slightly adapted from Fiesta at Rick's
     

Tuesday, December 27, 2011

Chinese Dessert

Kuih Kosui
Mini Sponge Cake
Chestnut Jello
Apom balik
Wheat porridge
Oyster omellete

Thursday, December 15, 2011

Taiwanese Beef Noodle

In preparation for the Chinese New Year that’s coming up this week on February 4th, 2011, I have decided to make some Taiwanese Niu Row Mein (Taiwanese Beef & Noodles).  This will be our fifth recipe for the International Pressure Cooking theme.
I am Chinese.  Born in Taiwan, but raised in the U.S.  And with the new Lunar year starting this week, there’s going to be lots of cooking, eating, cleaning and cooking some more.  Although Beef & Noodles aren’t really considered a traditional New Years dish, it’s still got noodles in it, and noodles signify longevity in the Chinese culture.  Which means, no cutting of the noodles when you eat it, or else it will cut your life short.  Which also means, when you see Chinese people eating noodles, there’s always a lot of noisy slurping.  See, now it all makes sense!  Okay, that’s all just silly superstition anyway.  To learn more about the Chinese New Year and the special foods that are prepared and the history, click here.

There are many different variations of Niu Row Mein.  Some are more spicy, some are more salty, and some are more about the soup.  This particular recipe is from my mom.  I told her I wanted to make it last week and she up and went to the Chinese Supermarket and bought me all the ingredients.  I could’ve totally gone on my own, but it’s a good thing she went because I think I would be wondering around in the store for hours looking for certain things.  Of course, she always makes it in a big pot on the stove and it usually takes 1-2 hours.  But in our trusty Peggy the Pressure Cooker, it should only take about 30-45 minutes.
INGREDIENTS:
  • 2 Serrano Chiles; chopped
  • 5 cloves of garlic; chopped
  • 1 one-inch cube of ginger; sliced
  • 3 Tbsp Rock Sugar
  • 2 Tbsp Spicy Bean Paste
  • 5 Star anise
  • 2 Tomatoes; sliced into wedges
  • 1 cup Rice cooking wine
  • 2 cup Light sodium soy sauce
  • 1 Medium Onion; sliced
  • 4 Cups Water
  • 3 pounds of beef shank; cubed into 1-2” chunks
(In case you’re wondering why my tomatoes look a little strange.  I happened to come across these at Trader Joes, they’re called Kumatos, brown tomatoes.  Thought I’d give them a try.  :P
There’s also a  jar of Spicy Bean Paste before I spooned some out into my little ramekin.)
NOODLES & GARNISHES:
  • 1-2 Packages of Oriental Style Noodles;  slightly flat, yellow noodles.
  • 6-8 Stalks of Small Bok Choy
  • 8 stems of Cilantro; chopped (Not pictured)
  • 3 stems Green Onions; chopped (Not pictured)
  • Sesame Oil (Not pictured)
First, let’s wash the beef.  Doesn’t that sound funny?  Put all the chopped beef shank into the main cooking pot of the pressure cooker.  Fill it up with water, enough to cover all the meat.  Press the START button on the pressure cooker.  This will start the heating element in the machine.  It’s not necessary to shut and lock the lid at this time.
Within about 10-minutes or so, you’ll start to see particles that you want to get rid of.  It’s sort of foamy and grimy.  It looks pretty gross.  Use a spoon and start spooning the gunk out and discard.  Turn the pressure cooker Off by pressing CANCEL.  Use an oven mitt and pour all the grimy water out.  Rinse the beef 1-2 times with fresh water and discard the water again.
Now comes the real cooking part.  The beef should be inside the main cooking pot still.  Add the soy sauce, the rice wine, water, and spicy bean paste.
Chop up all the other ingredients except leave the Star Anise and Rock Candy whole, then add them all into the pot.  Give it a good stir if you like but it’s not necessary.
Shut the lid and turn it counter clock-wise to lock.  Make sure the Pressure Valve is set to Airtight.  Program the pressure cooker to 30-minutes by pressing the SET PRESSURE COOK TIME button.  Now press START.  Let the machine do its thing.
At this time, you can start boiling a big pot of filtered water to cook the bok choy.  Get the water to a rolling boil.  Add the bok choy to the hot water and only cook them for under 5 minutes.  Remove and strain.  You can add the noodles to the same water and cook for 10-minutes until they are tender.  Do not overcook, of they will become mush.  Remove and strain the noodles.
When the pressure cooker has completed the 30-minute cooking cycle, it will beep and automatically go to Keep Warm.  Release all the pressure by turning the valve to Exhaust.  Unlock and open the lid.  Everything should smell totally spicy and like my HB said, it smells really Chinese.  (Not sure what that’s suppose to mean.  Hmmm….)
Stir the beef mixture and do a taste test.  If it’s too salty, add more water.  Find all the ginger and star anises pieces and discard.
Put noodles into a serving bowl first.  Top it with 1-2 bok choy stalks.  Then ladle the beef and soy sauce mixture onto the noodles.  Garnish with a splash of sesame oil, chopped cilantro and green onions.  Happy Chinese New Year!  GONG SHI FA TSAI!

Chocolate Fondue

Classic Fondue


First Posted: 10/27/11 05:55 PM ET Updated: 11/14/11 03:04 PM ET

Provided by:
20 mins total 0 mins prep

Ingredients

Directions

  • Shred the cheeses in a food processor with the shredding tool attached. To the cheese add 1 tablespoon of flour and stir.
  • Rub the inside of a fondue pot with a crushed garlic clove. Pour in white wine, kirsch and lemon juice.
  • Heat over a medium heat flame until the wine is hot but not boiling.
  • Add handfuls of cheese, stirring constantly with a wooden spoon until cheese is melted and the cheese-wine mixture has the appearance of a light creamy sauce.
  • Add nutmeg and white pepper to taste.
  • Remove the pot and place on a fondue stand surrounded by bread and vegetables.

Cheese Fondue

Classic Fondue


First Posted: 10/27/11 05:55 PM ET Updated: 11/14/11 03:04 PM ET

Provided by:
20 mins total 0 mins prep

Ingredients

Directions

  • Shred the cheeses in a food processor with the shredding tool attached. To the cheese add 1 tablespoon of flour and stir.
  • Rub the inside of a fondue pot with a crushed garlic clove. Pour in white wine, kirsch and lemon juice.
  • Heat over a medium heat flame until the wine is hot but not boiling.
  • Add handfuls of cheese, stirring constantly with a wooden spoon until cheese is melted and the cheese-wine mixture has the appearance of a light creamy sauce.
  • Add nutmeg and white pepper to taste.
  • Remove the pot and place on a fondue stand surrounded by bread and vegetables.

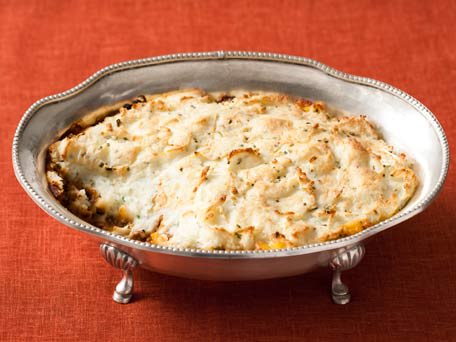
Shepards Pie

Quick Shepherd's Pie
New Media Publishing / Photography: Flat Art Studios.com / Stylist: Abigail Donnelly
Provided by:
30 mins total 25 mins prep
Facing a mound of uneaten mashed potatoes? Celebrate. It saves you a step when making this hearty beef shepherd's pie.

Ingredients

Directions

  • Heat the oil in a large heavy skillet over medium-high heat until it shimmers. Add onion, garlic, 1/2 teaspoon salt, and pepper and saute, stirring occasionally, until onion is golden, about 5 minutes. Add beef and 1/2 teaspoon salt and brown meat, stirring to break up lumps, about 4 minutes. Add soup and Worcestershire and bring to a boil. Boil until liquid in pan is completely evaporated, about 10 minutes.
  • Preheat broiler.
  • Transfer beef mixture to a 3-qt flameproof baking dish, then spread potatoes evenly over beef. Broil until potatoes are browned in places and heated through, about 8 minutes.

Mac and cheese

Macaroni and Cheese with a Crusty Crunch
Kristada Panichgul
Provided by:
30 mins total 10 mins prep 227 calories/serving
Everyone loves mac 'n' cheese -- and everyone knows how nutritionally bad it can be. Calories start at 600 per serving and go into the thousands. It's a dish that has become so rich that taming its fatty side proved to be quite a challenge. The base of the sauce in this version isn't cream, but a puree of cooked onions and garlic. It gives the dish lots of flavor with not so much as a gram of fat. The very hot oven makes the breadcrumbs on top get nice and crunchy. It's the combination of crisp and gooey textures that makes this a winning dish.

Recipe courtesy of Now Eat This!: 150 of America's Favorite Comfort Foods, All Under 350 Calories by Rocco DiSpirito/Ballantine Books, 2010.

Ingredients

Directions

  • Preheat the oven to 425 degrees F. Spray an 8×8-inch baking dish with cooking spray, and set it aside.
  • Bring a large pot of salted water to a boil. Add the macaroni and cook according to the package directions, 7 to 9 minutes; drain.
  • While the pasta is cooking, bring the Onion-Garlic Puree, mustard, and cayenne to a simmer in a small saucepan over medium heat, stirring often. Whisk in the cheddar until it has melted. Remove the pan from the heat and whisk in the yogurt.
  • In a medium bowl, toss the cooked macaroni with the cheese sauce to coat thoroughly. Season with salt to taste. Pour the macaroni into the prepared baking dish, and sprinkle the panko over the top. Top with the Parmigiano-Reggiano.
  • Bake until the cheese has melted and the macaroni is hot throughout, about 10 minutes. Serve immediately.
  • Onion-Garlic Puree

  • 1 Large Vidalia onion, roughly chopped
  • 9 garlic cloves, roughly chopped
  • 1/2 cup water
  • Salt and freshly ground black pepper
  • Combine the onion, garlic, and water in a microwave safe bowl. Season with salt and pepper to taste. Cover the bowl tightly with plastic wrap, and microwave on high for 10 minutes.
  • Pour the mixture into a blender and blend until it is completely smooth. Season with salt and pepper to taste, if desired. Store in a covered container in the refrigerator for up to 72 hours.

Baked Latkes

Baked Latkes


Provided by:
1 hr total 30 mins prep

Ingredients

Directions

  • Preheat oven to 425F. Wash and dry potatoes and remove the dry, outer skin from the onion (there is no need to peel the potatoes). Grate, preferable using a fairly large/coarse grater, potatoes and onion. Place mixture in a colander or sieve and press down firmly with a paper towel to remove some of the excess moisture. Stir potato mixture and repeat.
  • Transfer potato mixture to a large bowl and stir in the egg. In a small bowl, mix together the baking powder, salt and flour, then stir that in as well.
  • Drop latke mixture in 2-3 tbsp measures, forming 2-3 inch pancakes that are about 1/4 inch thick (sightly thicker is ok), on a lightly oiled baking sheet. Bake for 15-20 minutes, then turn the pancakes over, and bake for an additional 10 minutes. Latkes should be deep gold on both sides when done, so add a minute or two to the baking time, if necessary.

Tuesday, December 13, 2011

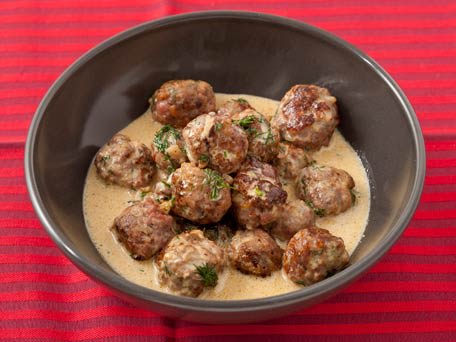
Swedish meatball with dill

Swedish Meatballs in Dill Sauce
New Media Publishing / Photography: Flat Art Studios.com / Stylist: Abigail Donnelly
Provided by:
40 mins total 30 mins prep
A double dose of dill and a little ground clove in these tender meatballs deliver a taste of Scandinavia.

Ingredients

Directions

  • Soak crumbs in 1 cup cream in a medium bowl until thick. Meanwhile, cook onion in 3 tablespoons butter in a 10-inch heavy skillet, stirring occasionally, until softened, about 6 minutes, then stir into crumb mixture. Add meats, dill, cloves, 1 1/2 teaspoons salt and 1 teaspoon pepper and combine well with your hands. Form mixture into 1 1/4-inch meatballs.
  • Preheat oven to 350F with rack in middle.
  • Heat oil in skillet over medium-high heat until hot, then brown meatballs in 5 batches, shaking skillet to maintain shape, and transfer as browned to a 3- to 4-qt baking dish. Add 3/4 cup water to skillet and boil, stirring up brown bits, until reduced to about 1/2 cup. Add remaining 1/2 cup cream and 5 tablespoons butter and stir until butter is just melted. Remove from heat, then stir in fresh dill and pour over meatballs. Bake until meatballs are no longer pink within, 8 to 10 minutes.
  • Make ahead: Meatballs can be made 3 days ahead, without fresh dill, and chilled (covered) once cooled. Just before serving, spread meatballs out in a large baking dish, then stir in fresh dill and heat in a 350F oven until heated through, about 8 minutes.

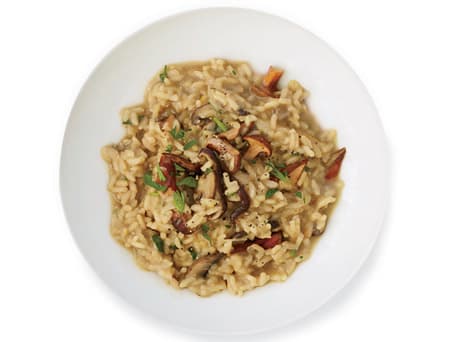
Wild Mushroom-and-Red Wine Risotto

Wild Mushroom-and-Red Wine Risotto
Frances Janisch
Provided by:
30 mins total 0 mins prep

Ingredients

Directions

  • 1. In a medium saucepan, bring the chicken stock to a simmer. Keep warm.
  • 2. In a large saucepan, heat the olive oil. Add the onion, season with salt and pepper and cook over moderate heat, stirring, until softened, about 5 minutes. Add the rice and cook, stirring, for 1 minute. Add the wine and cook, stirring until the wine is absorbed. Add 1 cup of the warm stock and cook over moderate heat, stirring constantly, until nearly absorbed. Continue adding the stock 1/2 cup at a time, stirring constantly, until it is nearly absorbed between additions. The risotto is done when the rice is al dente and suspended in a thick, creamy sauce, about 20 minutes total. Season with salt and pepper.
  • 3. Meawhile, in a large skillet, melt the butter. Add the mushrooms and shallot, season with salt and pepper and cook over moderately high heat, stirring occasionally, until softened and browned, about 10 minutes. Scrape the mushrooms into the risotto and stir in the cheese and parsley. Serve immediately.

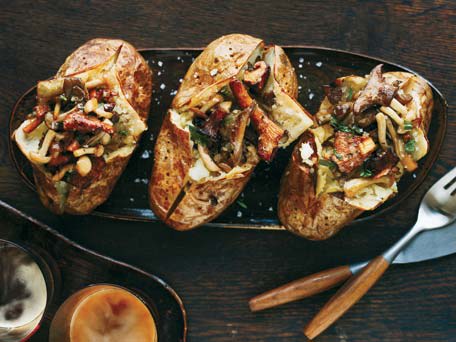
Baked Potatoes with Wild Mushroom Ragù

Baked Potatoes with Wild Mushroom Ragù
John Kernick
Provided by:
1 hr 30 mins total 0 mins prep
Grace Parisi likes using a mix of shiitake, oyster, chanterelle and button mushrooms for this succulent ragù to top baked potatoes , but any combination will work.

Ingredients

Directions

  • 1. Preheat the oven to 425°. Pierce the potatoes with a fork and rub with oil. Bake for 1 hour, or until tender when pierced.
  • 2. Meanwhile, in a large, deep skillet, melt the butter in the oil. Add the mushrooms, season with salt and pepper and cook over high heat, stirring occasionally, until tender, 20 minutes. Add the onion and garlic and cook, stirring, until the mushrooms are deeply browned, 8 minutes. Add the wine and cook until evaporated. Stir in the stock, tarragon and thyme and bring to a boil. Season with salt and pepper.
  • 3. Slit the potatoes and fluff the insides with a fork. Season with salt and transfer to plates. Spoon the mushroom ragù onto the potatoes and serve.

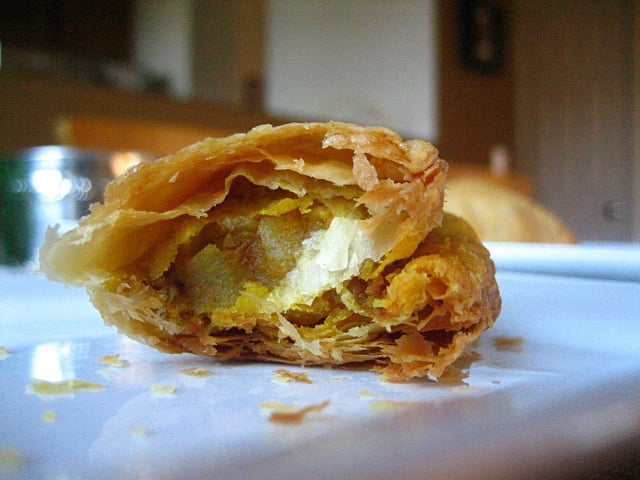
Curry Puff (from Rasa Malaysia)


Curry Puff
print Recipe: Curry Puff Filling:
5 tablespoons oil
1 medium red onion (finely chopped)
1/2 teaspoon kurma powder or chicken curry powder
2 teaspoons meat or chicken curry powder
1 teaspoon chili powder
1/2 teaspoon turmeric powder
1/2 cup of finely diced chicken breast meat
2 large potatoes (boiled and finely diced)
1 1/2 teaspoon sugar
1/2 teaspoon black pepper
1/2 teaspoon salt
Pastry:
1 lb plain flour
5 oz margarine or shortening
3/4 cup water
1/2 teaspoon of salt
Method:
Make the filling first. Heat oil and fry onion gently until golden brown. Add the kurma powder, curry powder, chili, turmeric and fry gently. Add the chicken, potatoes, sugar, pepper, salt and cook for 5 minutes. Mix well and leave aside to cool.
To make pastry, mix flour with margarine, water, salt, and knead well. Let it rest for 1/2 hour. Cut the dough into circles (3 in) in diameter. Fold pastry over to make a half circle and crimp at edges. Deep fry in hot oil until golden.

Monday, December 12, 2011

Artichoke dip

From Marthastewart.com

Ingredients

  • 2 cans (14 ounces each) artichoke hearts in water, rinsed, drained, and coarsely chopped
  • 1/2 cup light mayonnaise
  • 1/4 cup plus 1 tablespoon grated Parmesan cheese
  • 1 tablespoon fresh lemon juice
  • 1 garlic clove, coarsely chopped
  • 1 scallion, minced, plus more for garnish
  • Crudites (such as raw pepper wedges) or whole-wheat pita chips, for serving

Directions

  1. Preheat oven to 425 degrees. In a food processor, place half the artichokes, the mayonnaise, cup Parmesan, lemon juice, and garlic. Process until smooth.
  2. Add scallion and remaining artichokes; pulse once to combine. Transfer mixture to a 1-quart baking dish. Top with remaining tablespoon Parmesan.
  3. Bake until golden and bubbling, 30 to 35 minutes. Garnish with scallion, and serve with crudites or pita chips.

Sunday, December 11, 2011

Char Siu Pork

source: http://thespanishwok.blogspot.com/2011/12/char-siu-pork.

Char Siu Pork

Char Siu Pork, sliced & ready to eat

A classic chinese dish.  Those (my wonderful readers I mean) who are already familiar with The Spanish Wok will know just how much I love Char Siu, I sometimes wonder if I could actually eat it for breakfast, lunch, dinner and supper every day!!!!

My cooking method is a little different to most, but I promise you this way provides the most succulent, moist, delicious piece of pork you will ever have eaten.  Please give it a try and come back to let me know what you think, I'd love to hear from you.

This dish is a firm favourite in our household and it can be used in so many different dishes.  Subscribe or follow The Spanish Wok  and be the first to view more recipes including this delicious pork dish in the future.


Approx 750g pork tenderloin
1 1/2 tbs runny honey, mixed with 1 1/2 tbs hot water.

Marinade:-
3 tbs soy sauce
2 tbs sake or dry sherry
4 tbs hoisin sauce
1 tsp chinese five spice powder
1 tsp brown sugar
1 tsp ginger powder
1 tsp garlic powder
dash red food colouring (optional, but gives an authentic & beautiful colour)

Combine all marinade ingredients and put into a plastic freezer type bag.

Clean pork tenderloin by removing sinews etc, prick all over with a metal skewer and add pork to marinade in bag. Tie knot in top and massage marinade well into pork.

Leave in fridge overnight, massaging occasionally.

Preheat oven to 200c. Half fill a deep roasting tin with water and place a wire rack on top.

Remove pork from marinate (reserve marinate and set aside for later) and place on wire rack over the water bath.

Roast for 15 mins, remove and baste with marinate. Lower oven temperature to 180c and roast a further 10 mins.

Remove and baste with honey/water mixture. Roast a further 10 mins.

Let it rest and slice thinly.

Meanwhile, pour marinade into a small heavy saucepan and bring to a boil, simmer 2 mins and serve with pork.

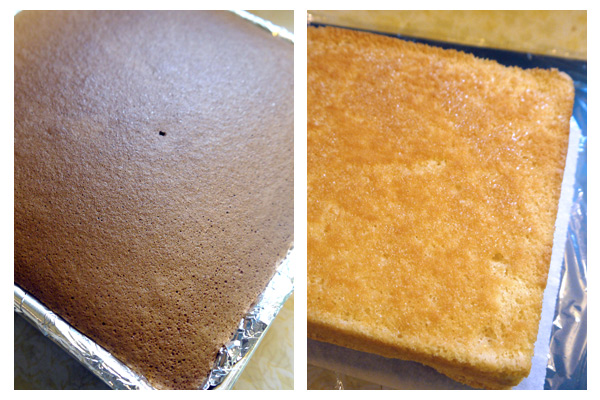
Japanese Honey Spongecake

Honey Castella
Yield: One 7 inch square cake
Ingre­di­ents
  • 5 Egg Yolks (room temperature)
  • 4 Egg Whites (room temperature)
  • 125 g Gran­u­lated Sugar
  • 100 g Bread Flour (sifted)
  • 15 g Turbinado Sugar (optional)
  • 50 g Honey (diluted with 2–3 tbsp. hot water)
Method
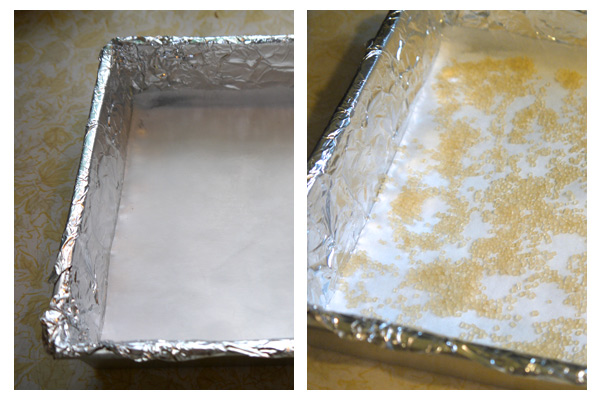
  1. Pre­pare pan: line insides and bot­tom of pan with foil and add a piece of parch­ment paper onto the bot­tom, sprin­kle with turbinado sugar.
  2. Pre­heat oven to about 325 F / 160 C.
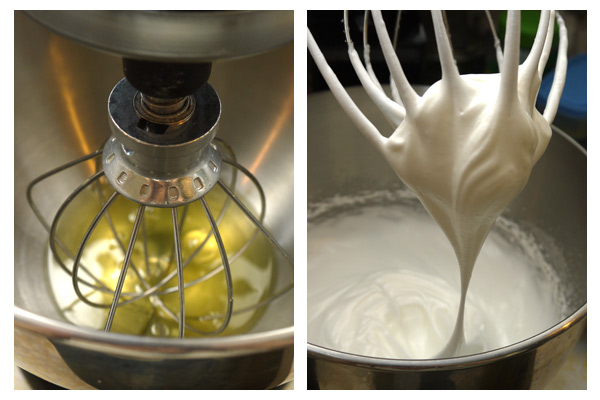
  3. Place egg whites in mix­ing bowl and mix with a mixer on high speed for about 30 sec­onds and start adding sugar in 2 — 3 times. Beat until firm peaks are formed.
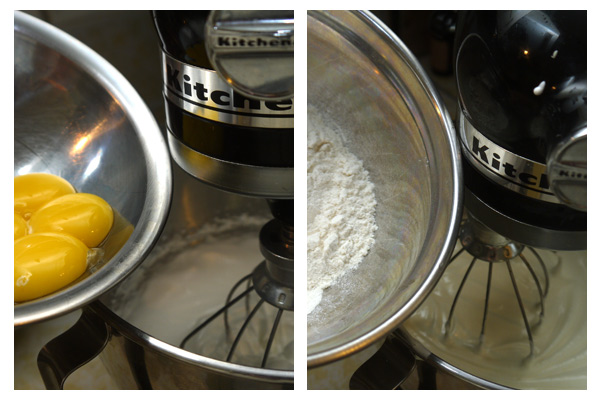
  4. Add yolks one by one and mix on low speed until well combined.
  5. Add sifted bread flour and mix on low speed until just combined.
  6. Add honey and hot water mix­ture and mix on low speed until mixed.
  7. Pour bat­ter through a sieve into cake pan, use a spat­ula or whisk to help the thick bat­ter go through the sieve.
  8. Tap pan on the counter to remove any large bub­bles in the batter.
  9. Bake in pre­heated oven for about 60 min­utes or until golden brown on top — check with a skewer to see if cake is ready.
  10. If ready, take out of oven (with oven mitts) and drop the pan on the counter from about a foot in height to pre­vent shrinkage.
  11. Cool cake. Revert cake onto a piece of parch­ment paper and plas­tic wrap, remove foil and wrap in plas­tic wrap until ready to serve (at least overnight) to pre­serve mois­ture in cake (leave upside down).
  12. Cut off edges and slice to serve!
http://​yum​my​work​shop​.com/​2​0​1​1​/​1​2​/​0​7​/​h​o​n​e​y​-​c​a​s​t​e​l​la/
YUM! I love this cake because it is so sim­ple, light and deli­cious. So moist, del­i­cate and rich in honey and egg flavour — per­fect with a cup of Japan­ese tea! The turbinado sugar is optional but it almost becomes a syrup on the bot­tom of the cake for even more mois­ture. This cake is best enjoyed the day after so it becomes more moist — kind of like rest­ing a freshly cooked piece of meat.

Baked Mushrooms with Rosemary

http://angiesrecipes.blogspot.com


Healthy and tasty, this baked mushroom dish with fresh herb, lemon and Parmesan couldn’t be any simpler. It can serve either as a delightful appetizer or just as a light side dish, which goes really well with any meat dishes.

Baked Mushrooms with Rosemary and Parmesan

adapted from Eat Smarter
  • 1 Bio lemon
  • 1 tbsp Fresh rosemary, chopped
  • 25 ml Olive oil
  • 300 g White mushrooms, sliced
  • 20 g Parmesan, grated
  • Salt and freshly mulled black pepper

  1. Rinse lemon under running hot water. Dry and finely grate the zest. Squeeze out the juice for later use. Combine the chopped rosemary, lemon zest, and olive oil in a bowl.
  2. Preheat the oven to 200C/400F. Clean and thinly slice the mushrooms. Place the sliced mushrooms in a baking pan. Drizzle half of the oil mixture over and season with salt and freshly mulled black pepper.
  3. Bake in the hot oven for 10 minutes. Sprinkle the grated Parmesan over the mushrooms and continue to bake 5 more minutes until the cheese has turned lightly browned. Remove and drizzle the rest of oil mixture and some lemon juice over. 
http://angiesrecipes.blogspot.com/2011/12/baked-mushrooms-with-rosemary-and.html

Thursday, December 8, 2011

Meringue (Rasa Malaysia)


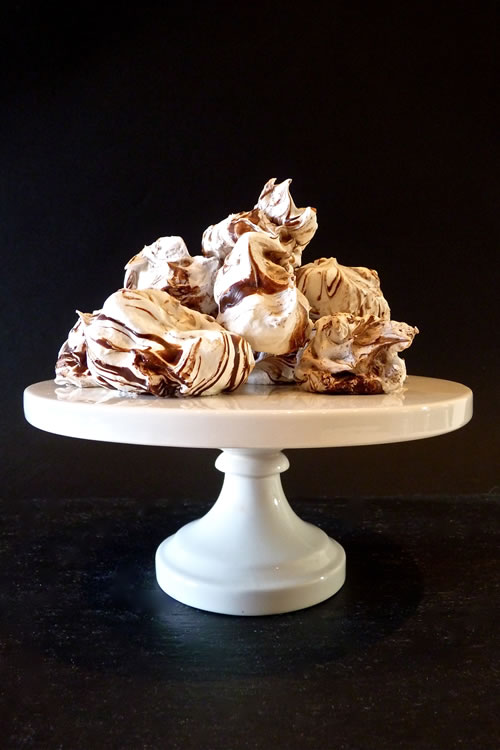
MARBLED MERINGUE
Make about 18 large (2-inch) or 36 small (1-inch) meringue
recipe by hungry rabbit
INGREDIENTS:
2 ounces bittersweet chocolate, finely chopped, melted and cool.
2 egg whites, large at room temperature
1/8 teaspoon cream of tartar
1/2 cup superfine sugar
1/2 teaspoon vanilla extract
1-1/2 teaspoons cornstarch
METHOD:
Preheat oven to 200℉/93℃ with racks on upper-middle and lower-middle position. Line two baking sheets with parchment paper.
Add egg whites to a clean bowl of a stand mixer fitted with a whisk attachment. Beat on medium speed until frothy. Add cream of tartar. In crease sped to medium high and beat to soft peaks, about 2-3 minutes.
Slowly add sugar, 1 tablespoon at a time until combined. Add vanilla and beat for about 3 minutes until stiff and shiny.Sift cornstarch over the meringue and gently fold in with a rubber spatula.
Transfer meringue to a bowl. Drizzle parallel lines of melted chocolate over the surface of the meringue. (Do not stir to marble the meringue, it will happen when in the next step)
Using a spoon, scraped across the surface of the mixture, crosswise to the drizzled lines, to get a rounded mound of striped meringue. Use a second spoon to push mound onto prepared baking sheets, 1-1/2 inches apart.
Continue scooping until you need to drizzle more chocolate. You may not use all the chocolate.
Bake meringue for 30 minutes. Switch the baking sheet from top to bottom and rotated from front to bottom. Bake for another 30 minutes. Turn off oven and fight the urge to open oven door. Leave meringues inside to dry, about another hour.

Eat them immediately or store in an airtight container for up to 4 days.

Chocolate Cake (Rasa Malaysia)

Rich Chocolate Cake
print Rich Chocolate Cake
Adapted from Little Teochew
Ingredients:
250g Butter
180g Castor Sugar
4 large eggs
200g Dark Chocolate
220g Cake Flour
1 tsp Baking Powder
1/2 tsp Baking Soda
2Tbsp Chocolate Powder
250ml Fresh Milk
Ganache Topping:
200g Dark Cooking Chocolate
1/2  cup whipping cream
50g butter
Method:
Melt the cooking chocolate in a double boiler. Set aside to cool.
Beat butter and sugar until light and fluffy.
Add in eggs one at a time beating well after each addition.
Pour in melted chocolate.
Fold in flour in 3 batches and alternate with milk.
Bake at a preheated oven at 160 degree Celsius for about 50 minutes. Test with a skewer, the skewer must come out clean.
Remove and let it cool before putting the topping.
Making the ganache:
Put chocolate, whipping cream and butter in a heatproof bowl over simmering water and stir until melted and smooth.
Let it cool slightly and spread on to the cake evenly.
Serve.

Eggless Tiramisu (Rasa Malaysia)


print I’ve known Terri from Hunger Hunger for many years. We connected when both of us were featured in a local Malaysian newspaper. Once in a blue moon, Terri and I would exchange emails and I even made plans to visit her in her hometown, Kota Kinabalu in Malaysian-Borneo, but the plan never panned out. One thing is for sure, Hunger Hunger continues to whet my virtual appetite with Terri’s fabulous home-cooked meals, baking recipes, her local dining experiences and travel eats. Please visit Hunger Hunger and you will be hungry for sure as Terri tempts us with her mouthwatering content and food photography. Please don’t miss out her heavenly eggless tiramisu recipe below.
I am honored and delighted to guest post on Rasa Malaysia, one of the top food blogs that inspired me to start my own blog 4 years ago. I don’t know if Bee remembers it, but I wrote to her asking for photography tips and was thrilled to my toes when she replied me. One of her tips, which I stick to, is to use white tableware and if you dine at my house and find that all my tableware are white, blame it on Bee!
Bee and I agreed on a tiramisu post and I took quite a while to make different versions of tiramisu (green tea, green tea with choc and classic) because Italian mascarpone cheese (pronounced “mas-car-pon-nay,” not “mas-car-pon”) is flown in only once a week by a wholesaler and the hotels get the first pick. I’ve found that only Italian mascarpone—creamy-white, less dense but silkier than clotted cream with a milky flavor that reminds me of good buffalo mozzarella—makes the best tiramisu.
Tiramisu is one of the easiest desserts to make. There’s no baking (unless like me, you make your own sponge fingers or sponge cake) and all you do is just assemble the dessert like how you make an English trifle. This is a recipe I’ve adapted from a wonderful recipe called Majestic Tiramisu (from the kitchen of the Majestic Hotel in San Francisco) found in one of my favorite cookbooks, San Francisco’s Cooking Secrets. What makes the Majestic tiramisu so heavenly is the use of chocolate ganache to sandwich the sponge fingers before they are dipped into a coffee-Marsala mixture. Most recipes do not include a chocolate layer. I’ve stuck to this recipe for 15 years because I’ve not found a better tiramisu recipe than this. I’ve amended the recipe to my liking by reducing the sugar, adding coffee liqueur to the espresso, whisking the heavy cream to give more volume instead of just mixing it with the cheese. I prefer to use home-made sponge cake instead of sponge fingers especially if I’m making a tiramisu gateau. The difference is totally worth the extra effort. Sponge fingers can sometimes turn out too wet or too dry.

After my photo shoot, I ate a slice of classic tiramisu and one bite was enough to remind me why the dessert is named tiramisu, meaning “pick me up.” The blend of coffee, chocolate, mascarpone and most of all, liqueur, will pick you up even on your gloomiest day.
The great thing about this recipe is that no raw eggs are used. That means that I can serve this cake a day or two after it’s made when the cake is at its best as the flavors would’ve blended and mellowed and the cake would’ve firmed up. I’ve never liked zabaglione and raw egg yolks make me uneasy. If you do like raw eggs, you can still incorporate them into the tiramisu. Experiment with the level of sweetness and liqueur too. That’s what cooking is about, tinkling with ingredients—kitchen chemistry—to create food that please your taste buds. The key to making a good tiramisu, or any dish really, is to use the best and freshest ingredients. Get the best coffee, the best liqueur, the best chocolate, the best mascarpone and leave the tiramisu overnight for the flavors to blend. Serve it the next day and be amazed by the most awesome tiramisu you’ve ever tasted. Buon appetito!


Heavenly Eggless Tiramisu
Ingredients:
2 cups (500 gm) mascarpone cheese
1 cup heavy cream (or 1 1/4 cups to stretch the mascarpone mixture)
1/2 cup (about 100 gm) semi-sweet dark chocolate
1 cup strong espresso
3 to 4 T coffee liqueur such as Tia Maria or Kahlua
30 sponge fingers (or a 10″ sponge cake)
1/4 cup caster sugar
1/4 cup dark rum (or Marsala)
Garnish: chocolate shavings or powder
Method:
1. Mix the espresso with the coffee liqueur; chill.
2. Melt the chocolate with 1/2 cup cream over a double boiler; cool.
3. Whip the remaining 1/2 cup cream (or 3/4 cup but remember more cream will give volume but dilute the flavor of the mascarpone) until stiff.
4. Using a hand-held whisk (a stand mixer will be too strong), whip the mascarpone with the sugar and rum until just mixed. Do not over whisk or the cheese will curdle. Fold the whipped cream into the cheese mixture. Chill until firm.
5. If using a sponge cake, cut into 3 layers about 1 cm thick. I used to cut the cake into 1/2 cm layers and sandwiched them with chocolate ganache. The result was the best tiramisu ever but was too much work because the thin sponge layers broke easily.
6. Lay a layer of 10 sponge fingers into a glass dish or bowl (or a slice of sponge cake on a serving plate), spoon about 1/3 of the espresso over the fingers to soak. Spread 1/3 of the chocolate ganache over the cake and then spread 1/3 of the mascarpone mixture over. Repeat and end with a layer of mascarpone.
7. Sieve a thick layer of choc powder over the tiramisu and/or garnish with choc shavings. Chill overnight or at least 12 hours.