http://userealbutter.com/2012/02/12/taiwanese-beef-noodle-soup-recipe/
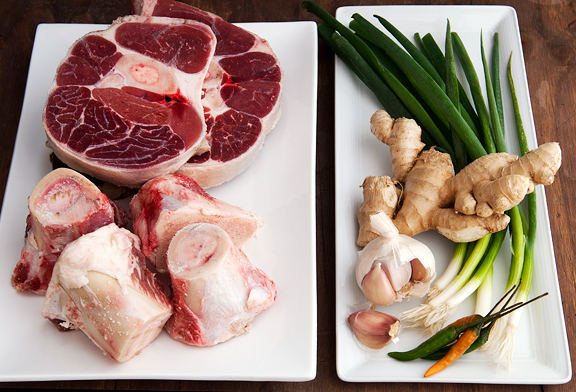
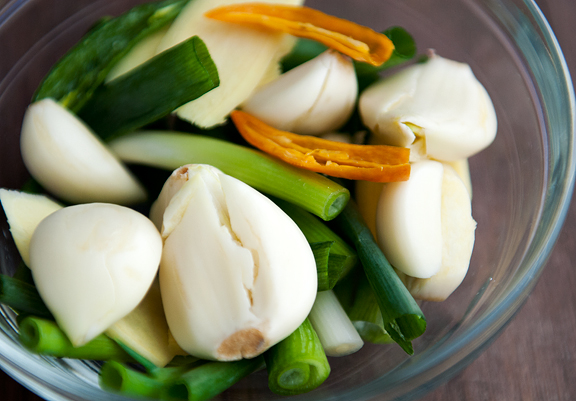
beef shank, beef marrow bones, green onions, ginger, garlic, thai bird chiles
 soy sauce, soy paste, dark soy sauce, chili black bean sauce, fermented bean curd, tomato paste
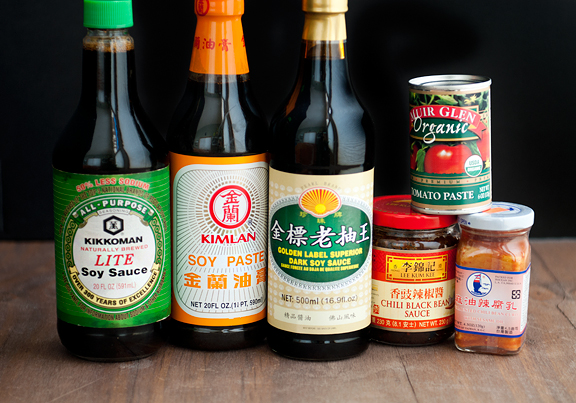 brown sugar, star anise, cinnamon sticks, dried orange peel, bay
leaves, fennel seeds, cinnamon bark, sichuan peppercorns, black
peppercorns

I’ve had a variety of homemade and restaurant versions of this beloved
soup. I’ve flipped through many recipes and never found one that really
called to me, until the other day when
Carolyn
posted a link to Chef Hou Chun-sheng’s winning spicy beef noodle soup
recipe. Winning, because Chef Hou dusted his competitors at the Taipei
International Beef Noodle Festival in 2011. I had most of the spices,
but for those in short supply or those I didn’t have, I knew where to
go.
got some more fennel seeds, bay leaves, cinnamon sticks, and picked up cassia bark

from savory spice shop, of course
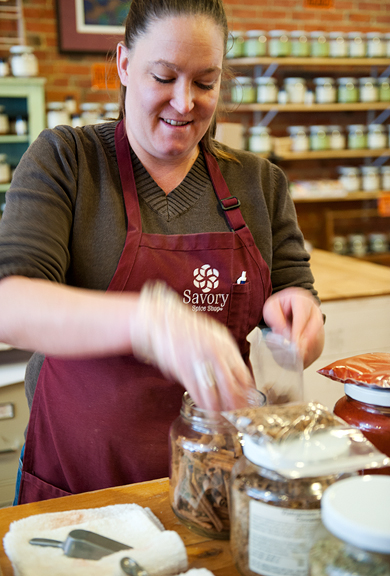
chinese herb bags: cinnamon stick, cinnamon bark, orange peel, anise, fennel seeds, sichuan peppercorns

Savory Spice Shop in Boulder
always has what I’m looking for. However, there were two items that I
think are pretty specific to Chinese herbal medicine stores: the cassia
buds and the angelica root. They didn’t have them (although they looked
them up and told me what they were) and I decided it wasn’t worth the
scavenger hunt at the Asian markets. My parents hadn’t heard of those
either and my dad suggested I omit them. I don’t know if this is kosher
or not, but I dried my own organic orange peel. I got beef marrow
bones because the butcher said it would lend a deeper flavor to the
broth. This soup is ALL about the broth. It costs more, but I am
convinced it is worth it. As for beef shank, I rarely find whole beef
shank anywhere but in the Asian markets, so I picked up a few pounds of
the bone-in cut beef shank.
make broth from the bones

aromatics: green onions, ginger, garlic, thai bird chiles
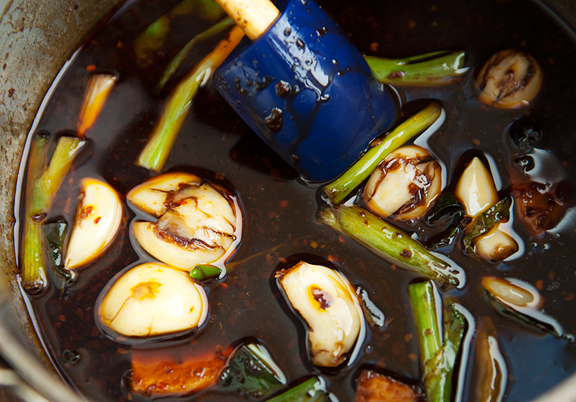
adding soy sauce, brown sugar, and hot bean paste to the sautéed aromatics
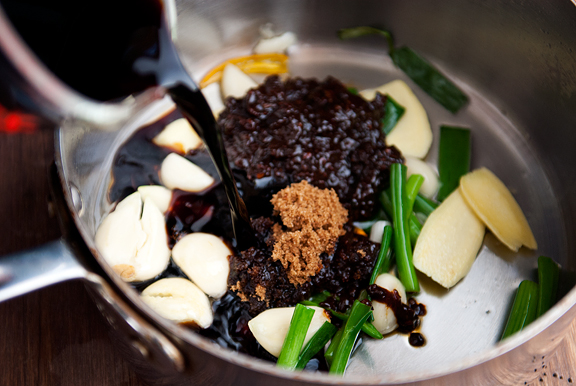
Now, you can make this in one longish day or you can make this over the
course of two days. It really depends on a couple of factors: 1) if you
use a conventional stock pot or if you use a pressure cooker and 2) if
you defat the broth and sauce (at all, the quick way, or the slow way).
Personally, I feel the pressure cooker is the better choice because it
is so much faster, more energy efficient, and achieves a tenderness in
the beef that is effortless. Physics. It is totally your BFF.
let the sauce cook for a minute
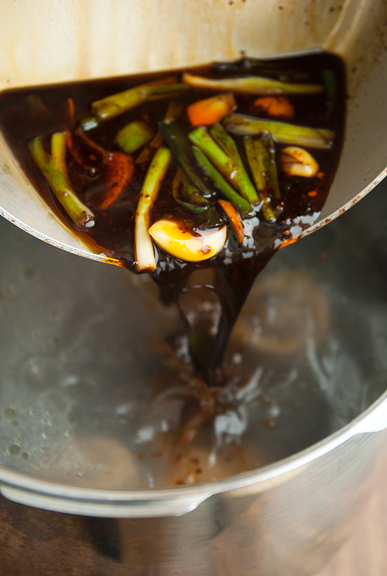
then pour it into the beef stock
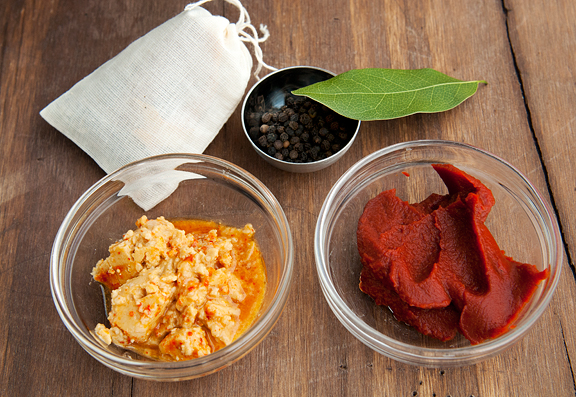
add fermented tofu, tomato paste, herb bag, bay leaf, and black peppercorns to the broth
The stock can either simmer for 6 hours in
the stock pot, or go 30 minutes in the pressure cooker (and then another
30 minutes on natural decompression). Six hours versus one hour? Did I
ever mention how much I love my pressure cooker? Regardless of which
method you choose, when you first boil the bones in water, you need to
skim off the scum that surfaces for the first ten or fifteen minutes.
The beef stock is part 1. Now on to part 2, which is the beef
sauce.
add enough water to cover the beef shanks

cooked through
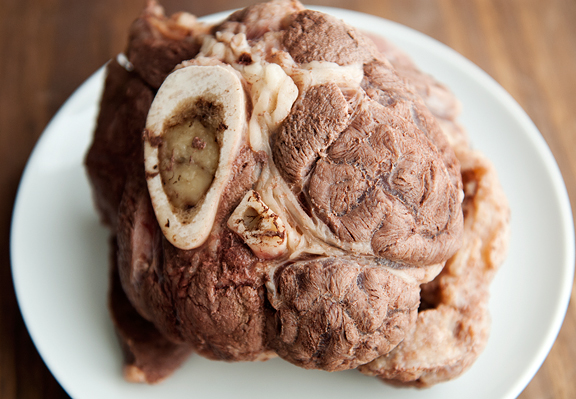
You will need another pot if your beef stock is cooking on the stove.
If you can, use a pressure cooker. I don’t have two (yet), but if I
did, I would have done this in my second pressure cooker. The beef
shanks are boiled in water until they are cooked through. Remove the
shanks and strain the beef water into another vessel. Don’t throw the
beef water out – it’s got flavor. I think if I had found whole shanks, I
might not need to have strained the water. Because I had bone-in
shanks, I wanted to remove any potential bone bits and junk from the
beef water by straining it through a fine-mesh sieve (you will use the
sieve a lot for this recipe). Wipe the pot down and sauté the remaining
half of the aromatics just like you did for the beef broth, then add
the sugar, hot bean paste, and soy sauce.
stir in fermented bean curd, dark soy sauce, and soy paste

add the black peppercorns, bay leaf, herb bag, and the beef
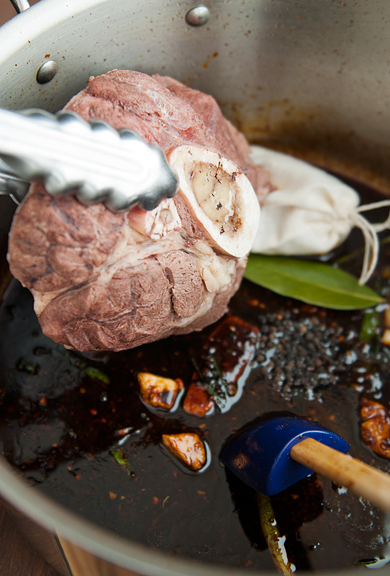
pour in the beef water
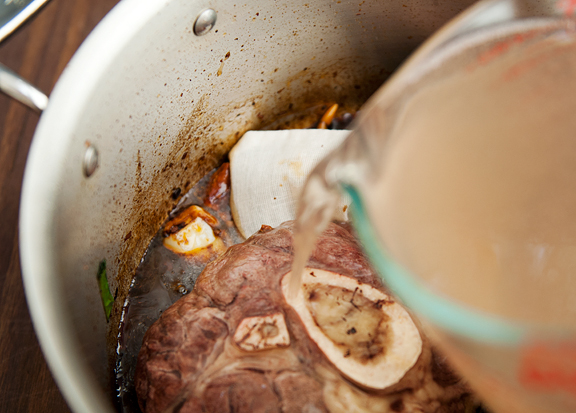
The recipe calls for adding just enough beef water, but I added all of
it. Also, before I started blogging, I never knew there was anything
other than soy sauce. Now I know there is soy paste, soy sauce, dark
soy sauce, light soy sauce, thick soy sauce… And they are all in my
cupboard and refrigerator. Right, so you let the beef simmer for 30
minutes or another 2 hours if you want it tender. Take it from me – you
want it tender. There is something quite magical when meat reaches
that “falling off the bone” tenderness stage. Barbecue aficionados know
of what I speak. I waited for my pressure cooker to finish its first
job (the broth) before putting it to work on the beef. I set it on high
for 30 minutes with a natural decompression (another 30 minutes).
broth is done (nearly clean bone)
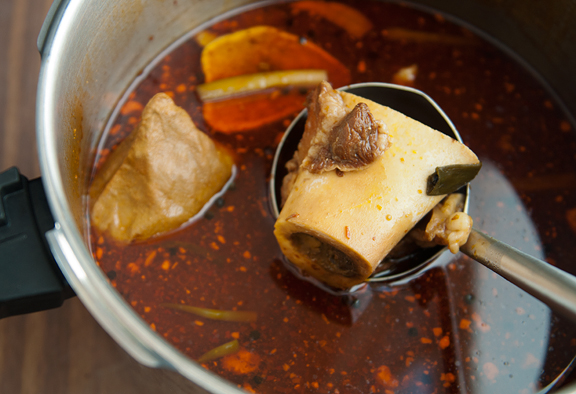
strained broth

removing fat from the chilled broth
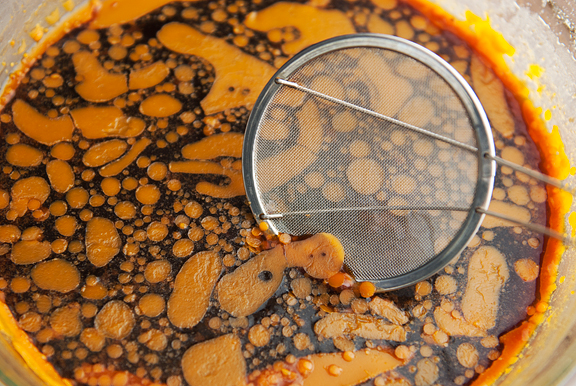
I defat all of my homemade broths. My mom always does this and I think
the end product is healthier. Maybe it’s just habit, but I think it is a
good one. It does requires a few extra steps. The photo above shows
how you defat by chilling the broth (I put it on my deck which was
reading 10°F) and skimming off the solidified fat. Another favorite
method which is much faster is the ziploc bag trick where you pour hot
broth into a giant ziploc, seal it, then pierce a hole at the bottom
corner and drain the broth into a vessel, pinching the corner shut right
as the fat layer reaches it. I give more detailed instructions in the
recipe below.
When the beef is done, I take the beef out of the sauce and remove
any connective or fatty tissue from the meat. Strain the sauce through a
fine-mesh sieve and defat it. At this point you should have tender
beef, beef broth, and beef sauce. The soup base is 4 parts beef broth
to 1 part beef sauce. Now let’s gather the noodles and all of the
goodies. Toppings can include lettuce, chopped tomatoes, fresh
cilantro…
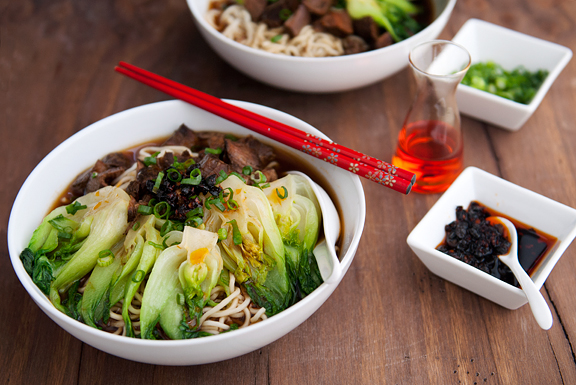
my favorite toppings: black bean hot sauce, chili oil, baby bok choy, green onions

cooked noodles, broth, sauce, beef, chili oil, sautéed bok choy, green onions, hot sauce

ladling beef broth over the noodles, bok choy, and beef

a drizzle of chili oil

It’s good. It is so good! I made mine spicy, because that’s what
Chinese people do. Jeremy had his “plain” and gave it a happy nod of
approval, his smile barely keeping in the mouthful of noodles. My
parents had expressed their doubts over the phone, but they were equally
curious as to how it would turn out. It’s rare that I will actually
stamp my feet with joy when I sit down to eat, but this is one
happy-making bowl of Taiwanese beef noodle soup.
the happy-maker
Taiwanese Beef Noodle Soup
[print recipe]
from Chef Hou via Food Gal with lots of my own notes
2.5 lbs. beef bones (mine were beef marrow bones)
2.5 lbs. beef shank (mine had bone in the middle)
herb bags
2 g whole star anise (about 2)
2 g (1 tsp) fennel seeds
2 g angelica roots (I omitted because I couldn’t find it)
2 g dried orange peel (about 4 pieces)
6 g (1 tbsp) Sichuan peppercorns
6 g cassia buds (I omitted because I couldn’t find it)
6 g (1 tbsp) cinnamon bark
6 g cinnamon sticks (two 3-inch sticks)
aromatics and such
4 tbsps vegetable oil
6 green onions, 4 chopped into 3-inch pieces, 2 finely sliced for topping
12-14 garlic cloves, peeled and smashed
2-inch piece of ginger, peeled and sliced lengthwise about 1/8-inch thickness
4 Thai bird chiles, halved and seeded
1 oz rock sugar or 2 tbsps dark brown sugar
3/4 cup hot bean paste
1 cup soy sauce
1/2 cup spicy fermented bean curd
1/4 cup tomato paste
1 tbsp black peppercorns
2 large Bay leaves
4 1/2 tbsps soy paste
2 1/2 tbsps dark soy sauce
to serve
noodles of your choice
baby bok choy for garnish (optional)
chili oil for garnish (optional)
other spicy chili pastes of your liking (optional)
fresh cilantro for garnish (optional – I omitted)
Equipment: Either way, you’re going to be washing a lot of
dishes. You will need: a large stock pot or pressure cooker – two is
preferable if you’re into multi-tasking (which I am), a medium saucepan,
a mesh skimmer, a fine-mesh sieve, and two cloth spice bags.
Chinese herb bags: [You don't have to use herb bags if you
plan on straining your broth and sauce.] Split all of the herb bag
ingredients in half and place the halves in two separate spice bags.
Each
bag should contain approximately: 1 whole star anise, 1/2 teaspoon
fennel seeds, 1 gram angelica roots (I omitted because I couldn’t find
this), 2 pieces of dried orange peel, 1/2 tablespoon Sichuan
peppercorns, 3 g cassia buds (I omitted because I couldn’t find this),
1/2 tablespoon cinnamon bark, and one 3-inch cinnamon stick. Tie the
bags off.
Make the beef broth: Place the beef bones and a gallon of
water in a large stock pot or the pot of pressure cooker. Bring the
water to a boil and skim off the scum that accumulates on the surface
for about 10-15 minutes or until the scum production reduces
considerably. Let it continue to boil gently while you work on the
aromatics. In a medium saucepan, heat 2 tablespoons of the vegetable
oil and sauté
half of the: green onions, ginger, garlic, and Thai bird chiles until fragrant. Then add
half
of the: sugar, hot bean paste, and soy sauce. Let it all simmer for a
minute and then pour the contents into the beef broth. Stir
half of the fermented bean curd and
all of the tomato paste into the broth. Add
half
of the black peppercorns, one bay leaf, and one bag of Chinese
seasonings to the broth. If cooking with a conventional stock pot,
simmer the broth for 6 hours. If cooking with a pressure cooker, I let
it cook on high (Fagor setting 2) for 30 minutes and natural
decompression. Strain the broth with a sieve. Discard the solids.
Defatting the broth (optional): I like to defat my broth and
there are a couple of tricks I use. The first and fastest is to set a
gallon-size ziploc bag in a bowl or container with high sides. Pour the
broth into the bag taking care not to spill. Don’t fill it up, leave
it a cup or two shy of capacity. Seal the ziploc and make sure you
don’t squeeze it from the bottom, busting the seal open and spilling hot
broth all over the place. Holding the ziploc from one of the top
corners, you should have a bottom corner pointed down toward a large,
clean vessel to capture the broth. It’s highly advisable to do this in
your sink. By now you should see the fat separating into a nice layer
on the top. Lower the bottom corner of the bag into the vessel (if it’s
too far above the vessel, you will spray broth all over the place) and
with the tip of a very sharp knife, poke a little hole just 1/8-inch
above the corner. The broth should spill slowly into the vessel as you
hold it from the top. If you’re comfortable with the method, make the
hole bigger and let the broth drain faster. As the fat layer approaches
the hole, pinch it off with your fingers. Discard the fat and ziploc.
If you had more broth than would fit into the first ziploc, repeat with
a second bag until you are done defatting all of the broth. The second
method is less wasteful, but takes longer. Essentially, you want to
cool the broth until the fat (which floats to the top) solidifies so you
can skim it off. I really hate putting such a large volume of warm
broth in my refrigerator and since I only make these kinds of soups in
winter, I just cover it with a lid or plastic wrap and let it cool on my
deck which ranges anywhere from -25°F to 30°F for a good fraction of
the year. [Note: My deck is a 2nd story deck and has no "access" from
the ground floor. I would never put it on my front doorstep. If you
live in a place where critters abound, I wouldn't recommend putting it
outside unattended where said critters could get into your delicious
broth.]
Cook the beef shank and make the beef sauce: Place the beef
shank in a pot or saucepan and fill with enough water to just cover the
beef. Boil the beef shank until the meat is cooked through. If using
whole shanks, remove the beef from the water and slice into disks about 1
1/2 inches in thickness (Chef Hou says 1/3-inch thick, but I like the
beef thicker). If using beef shank cuts, just remove from the water and
set aside. Save the beef water. In a large saucepan, stock pot, or
pressure cooker pot, heat 2 tablespoons of vegetable oil and sauté the
remaining green onions, ginger, garlic, and Thai bird chiles until fragrant. Add the
rest of the sugar, hot bean paste, and soy sauce. Let cook for a minute. Stir in the
remaining fermented bean curd,
all of the soy paste, and
all
of the dark soy sauce. Lastly, add the rest of the black peppercorns,
one bay leaf, and the other Chinese herb bag. Place the beef in the
stock pot or pressure cooker containing the sauce. Add all of the beef
water and stir to make sure it mixes with the sauce. If cooking with a
conventional stock pot or saucepan, cover with lid and simmer for at
least 30 minutes. If you want the meat to be tender, let it cook for
another couple of hours, but check on the water levels to make sure they
don’t get too low. If cooking with a pressure cooker, your only option
is tender meat. Again, I let mine cook on high (Fagor setting 2) for
30 minutes with natural decompression. If using bone-in shank, the meat
should fall off the bone when it is done. While the beef is warm, I
like to discard any fat or connective tissue from the meat, reserving
the lean beef in a separate vessel. Strain the sauce through a sieve
and discard the solids. Follow the defatting process as listed above
for the beef broth if desired.
Assembly: Bring fresh water to a boil and cook your noodles
(fresh or dried). Drain the noodles and let cool. Blanch or sauté baby
bok choy and set aside. Combine 4 parts beef broth with 1 part beef
sauce in a saucepan. Add beef to the broth and bring to a boil. Remove
from heat. Place noodles in a bowl and top with beef shank, bok choy,
and chopped green onions. Ladle the broth-sauce over the noodles.
Drizzle some hot chili oil over top (purely optional, but mandatory in
my book) and serve with more hot chili sauce on the side. Serves 10-12.
Makes about 10 cups of broth and 8 cups of sauce.


